
Start with one image and a short film
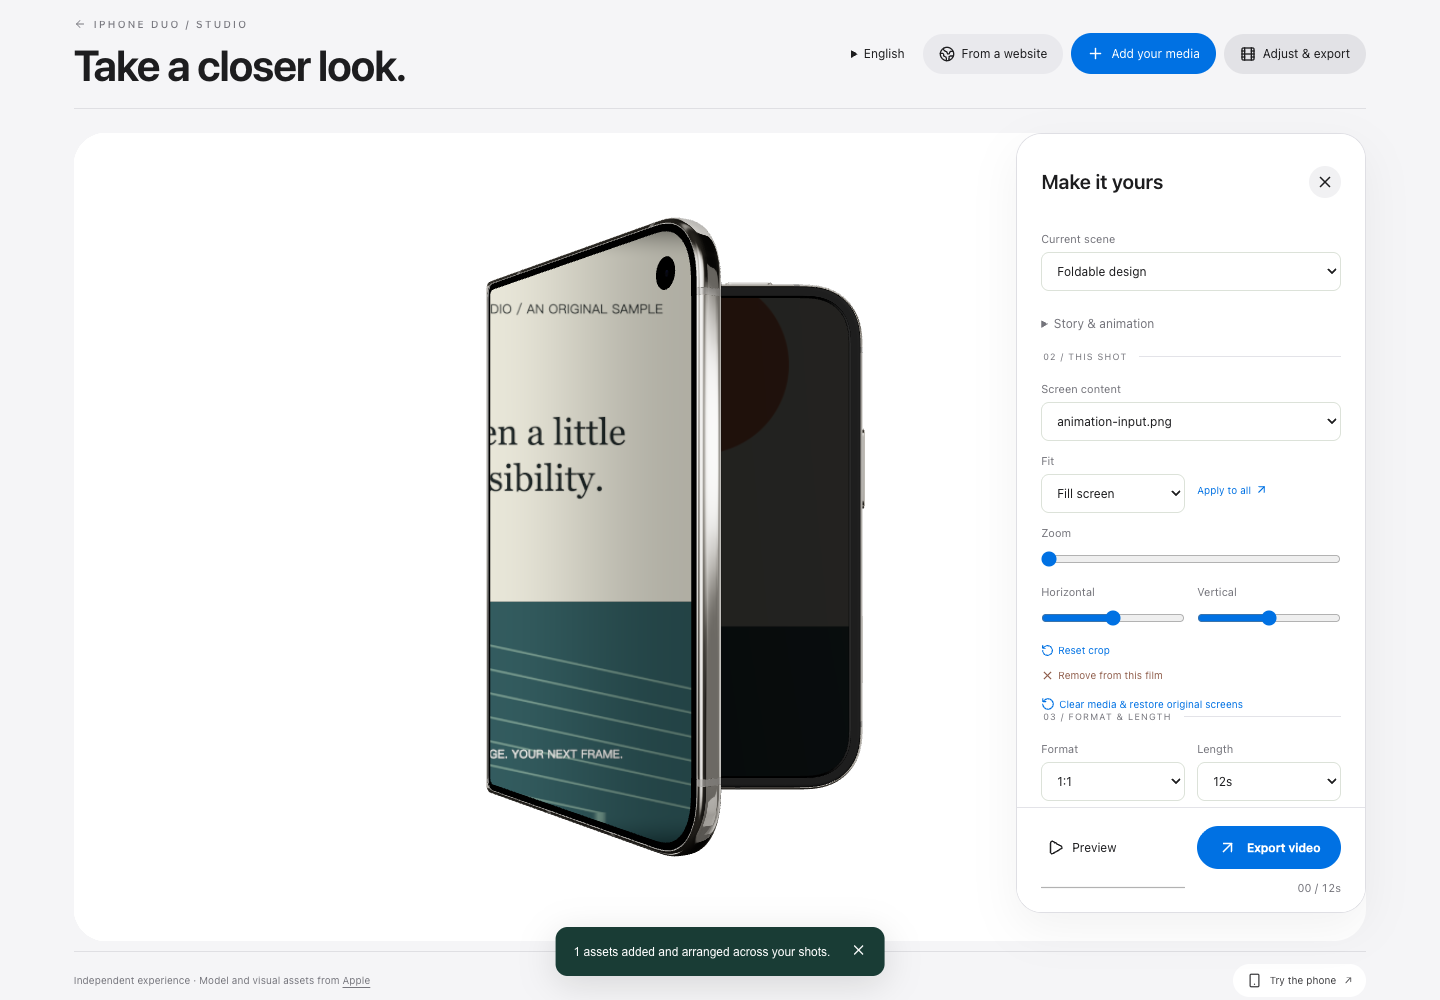
Open Duo Studio, choose Add your media, and select a photo or video you have permission to use. Open Adjust & export to reach the detailed controls. Start with a still image and a 12-second film so you can check the framing before building a longer sequence.
This creates a rendered product-style animation. It is not a recording of your app running on a real iPhone Duo, and it does not turn a website into an installed iOS app.
1. Prepare the source media
The current importer accepts JPEG, PNG and WebP images up to 15MB each, and MP4, WebM or QuickTime video files up to 80MB each. A supported file extension alone does not guarantee the browser can decode its codec. If a video fails to open, try a shorter, broadly compatible MP4 or use a still frame first.
Use a clear focal point with some space around it. A landscape photo and a vertical clip will crop differently on the virtual screens. Large images are reduced locally to a maximum dimension of 2560 pixels; this tool is intended for screen compositions, not preserving a full-resolution photo archive.
2. Assign media to the views
Choose a view in the editor, then choose the media assigned to it. Check both the inner and outer screen fields where available. Use the same source across views for a continuous reveal, or assign different sources to make opening the phone reveal a second image.
The project can hold up to 12 imported items. Importing a file is only the first step: inspect the views that appear in your chosen sequence to make sure they use the intended media. If you change a source later, preview the sequence again.
3. Fix the crop before adding motion
Adjust the media zoom and position for the selected screen. Keep faces, logos and important text away from the crop boundary. Check the image at both open and folded moments instead of assuming one still preview represents the entire film.
For a simple test, use a picture with a clear top and bottom. That makes unintended orientation or cropping easier to spot. The screen-size comparison explains why a source image can leave space or need cropping on screens with different shapes.
4. Choose the sequence and output shape
Select a template such as Showcase, A surprise or The loop, then adjust the title if you want one. The output shapes are 16:9, 9:16 and 1:1, with duration choices from 12 to 30 seconds. A vertical output changes the film’s composition; it does not automatically redesign text embedded in your source image.
Preview the complete sequence. Look for abrupt changes between views, a title covering the subject and media that feels too tightly cropped. Change one thing at a time so you can see what improved.
5. Export and check the downloaded file
Select Export video and keep the page visible until recording finishes. Export targets a 1080p frame at 30 fps: 1920 × 1080 for landscape, 1080 × 1920 for portrait or 1080 × 1080 for square. Actual smoothness also depends on the browser and device keeping up with rendering.
The output is silent. The browser determines whether MP4 recording is supported; otherwise the tool uses WebM. Source video sound is not mixed into the export. Add sound later in an editor that supports the file you downloaded, and verify the final format required by your destination platform.
Open the downloaded file before closing the project. Check its beginning, middle and end, the crop and the intended duration. Save your original media separately too: the creative project is held in the current session and is not a long-term cloud project library.
Example: one original image, one folding film
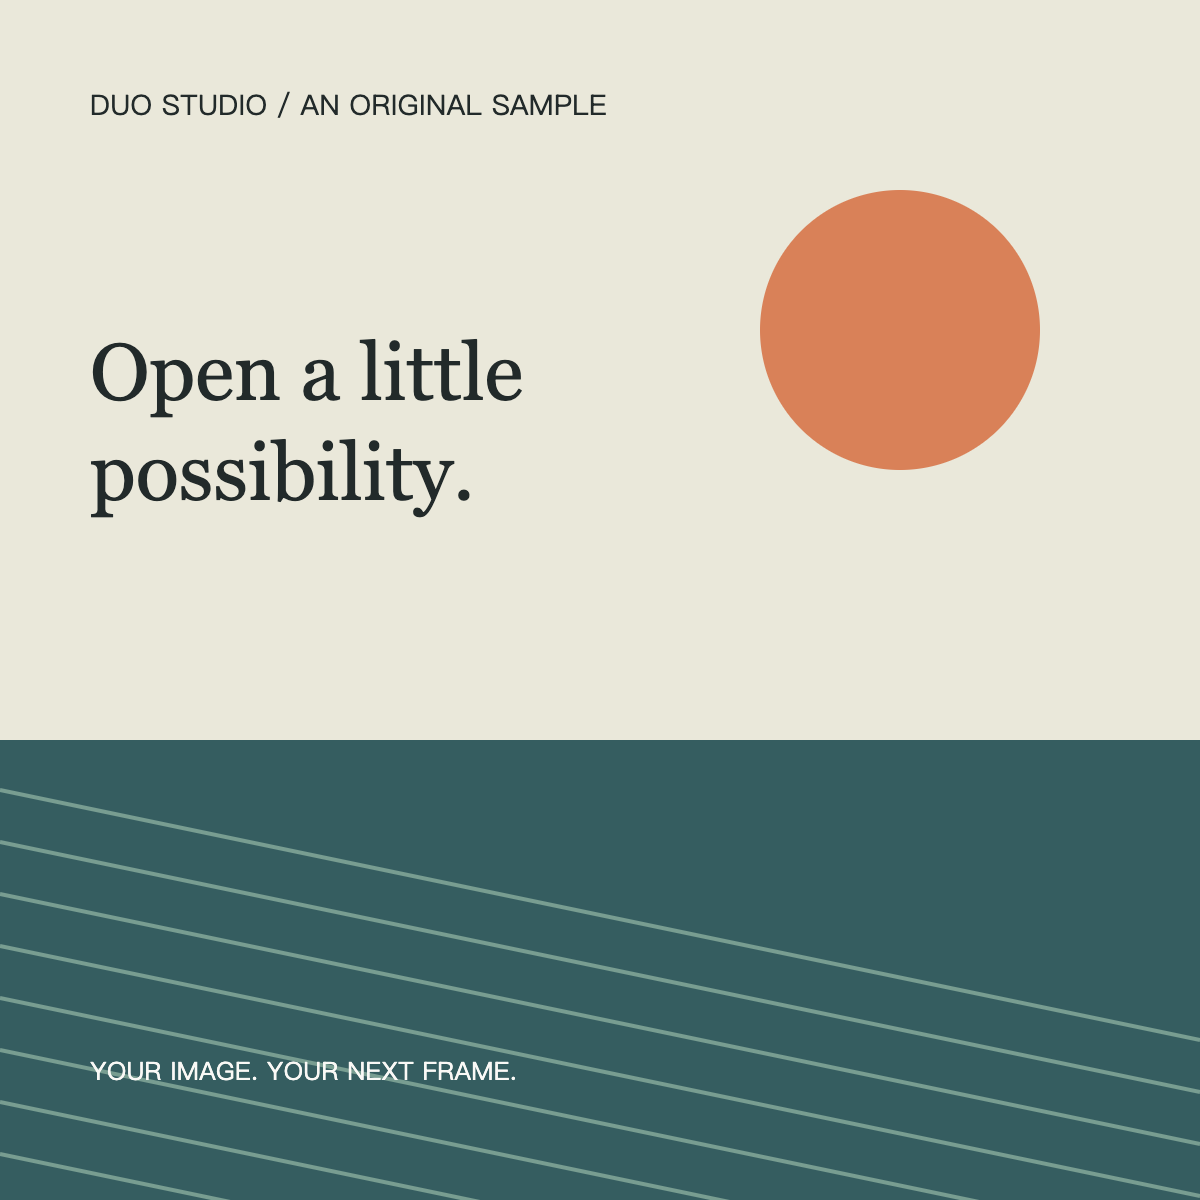
The example below uses an original graphic made for this guide. It is a reproducible starting point for experimenting with framing, not a downloaded social-media template.
Troubleshooting
The export stops or never downloads
Keep the tab in the foreground and avoid locking the screen. Backgrounding the page can interrupt or cancel recording. Start with the shortest duration, close other demanding tabs and retry. If the preview itself is not smooth, do not assume the exported film will be smooth.
My video imports but has no sound
Silent export is the current behavior, including projects with a video source. The tool does not provide an audio timeline or soundtrack mixing.
Can I use a green-screen or CapCut template?
You can import compatible media that you own or have permission to use, but this workflow does not require a third-party template. It does not promise transparent-background export, a CapCut project file or automatic compatibility with every editor. Test the downloaded MP4 or WebM in your chosen editor before preparing a larger project.
Are my photos uploaded?
The local photo/video import workflow processes media in your browser. The separate website-card feature makes a server request for the URL you enter; it is a different workflow and not a live screenshot of your site. See the privacy page for the site’s wider data practices.
Credits and next steps
The 3D tour and films use assets from Apple’s public product presentation; those rights remain with their owners. This site provides the tour controls and creative tools and is not affiliated with Apple. Our original sample graphic is available for you to reuse in your own tests.
Open Duo Studio and make your animation. For an overview of the device rather than the creative workflow, see the specifications.